Frisco E-Bike

E-Bike Parts

E-Bike Displays

LCD/LED displays and replacement screens matched to your controller protocol.

The display is the part you look at most and the part that gets hit first in a crash or a garage tip-over. Cracked screens, faded LCDs from Texas sun, water behind the glass, and buttons that stop responding are all common, and a replacement display is usually a simple swap if you buy the right one. The problem is that displays are not interchangeable the way handlebar grips are: the display talks to the controller over a serial protocol, and the two have to speak the same language.

Every display has a maker (KT, Bafang, Lishui, King-Meter, and many house brands), a model number, a connector type, and a protocol. The model is usually printed on the back or inside the battery cover; the connector is typically a five-pin waterproof plug or a bare-wire pigtail; and the protocol is whatever the controller firmware expects. Same maker does not guarantee compatibility, because some makers ship both UART and CAN versions of the same display model. When the display is wrong you usually get a blank screen, a scramble of segments, or an error code rather than damage, but it is still a wasted purchase.

If you are replacing a broken stock display, the bike maker's own replacement or the exact same model number is the clean answer. If you are changing controllers, buy the display the controller maker recommends, and if you are building from scratch, choose the pair together. Displays also set system behavior (wheel size, speed limit, assist levels, sometimes voltage) through their settings menus, so keep the manual. Mismatched electrical parts can damage a controller or battery; when you are unsure which display your bike uses, an E-Bike Assessment is the safe next step.
3 products

Shop e-bike displays

Open a product for our full notes, pros and cons, and the link to its Amazon listing. We do not sell or ship products ourselves.

Filter

Mechanic working on bike components
E-Bike DisplaysFeatured

KT-LCD3 E-Bike Display

The KT-LCD3 is the display most conversion-kit riders learn on. It is a monochrome LCD with a separate three-button pad, a deep settings menu (P and C parameters) and the ability to set wheel size, speed limit, assist levels and current limits on KT controllers. It is not pretty, but it is legible in sun and the parameter menu is documented all over the internet. If your bike has a KT controller and a dead or cracked display, an LCD3 is the cheapest functional replacement; the LCD8H is the same protocol in a more modern package.

Best for: KT controller kits that need a replacement display · Tinkerers who want access to controller parameters · Riders who value readability over looks

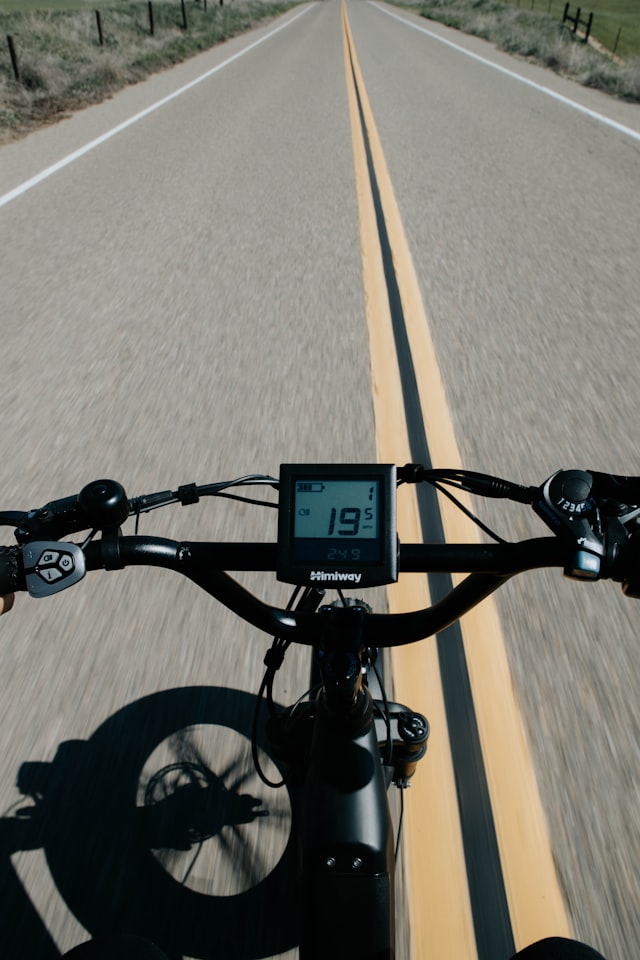
Electric bike handlebar and display detail
E-Bike Displays

Bafang DP C18 Display (UART) for BBS02/BBSHD

The DP C18 is one of Bafang's most common displays for BBS02 and BBSHD mid-drive kits: a color LCD with a separate button pad, speed, battery, assist level, and a settings menu that lets you set wheel size and speed limit. Bafang sells it in UART and CAN versions that look the same and are not interchangeable, so the first job is to know which protocol your motor uses (BBS02/BBSHD kit motors are typically UART). Replacement is plug-and-play if the protocol and connector match; otherwise it is an expensive paperweight.

Best for: BBS02B and BBSHD kits with a failed or cracked display · Riders upgrading a small Bafang display to a color screen · Anyone who wants a known-quantity Bafang accessory

Hands-on bike repair work
E-Bike Displays

KT-LCD8H Color E-Bike Display

The KT-LCD8H is KT's color display for the same controllers that run the LCD3. It has a brighter, higher-contrast screen, a built-in button pad, a USB charging port on most versions, and the same parameter menus under the hood. For a KT kit it is the nicer upgrade, and it is the one to buy if you are replacing a broken display anyway. The screen is more prone to glare than the LCD3 in direct sun, and the integrated buttons mean the whole unit mounts near the stem rather than splitting display and pad.

Best for: Upgrading a KT-LCD3 to a color display · Replacing a broken KT display on a kit bike · Riders who want a USB charging port on the bars

How to choose e-bike displays

Protocol and controller match

This is the whole game. Match the maker and protocol (UART versus CAN on some brands) to your controller, ideally by exact model number. When in doubt, buy the controller and display as a kit.

Connector type and pin count

Count the pins on your current display plug and note whether it is a waterproof round connector or bare wires. Adapters exist but add a failure point.

Readability in sun

A transflective or high-brightness LCD is far easier to read in North Texas summer light than a dim backlit panel. Check photos of the screen outdoors, not just in a studio.

Button layout and mounting

Integrated displays mount on the bar with a clamp sized for 22.2mm or 31.8mm bars; separate button pads reach the left grip. Make sure it fits your cockpit alongside the throttle and brake lever.

Settings access

Decide whether you need to adjust wheel size, speed limit, or assist levels. Some budget displays lock those out; others expose a full menu with a PIN.

Compatibility notes

  • A display from the same maker as your controller is not automatically compatible; confirm the model and protocol on your bike, since UART and CAN versions exist under similar names.
  • Pin counts and pinouts on five-pin waterproof plugs are not standardized across brands; matching the physical plug does not guarantee matching signals.
  • Controllers and displays are usually sold as matched pairs for exactly this reason. Mismatched electrical parts can damage a controller or battery; if unsure, an E-Bike Assessment is the safe next step.
Installation considerations

  • Remove the battery before disconnecting the old display.
  • Align the arrows or key on the waterproof plug and push straight in; forcing a misaligned plug bends pins.
  • On first power-up, go through the settings menu and set wheel size and units so speed and odometer read correctly.
  • Leave enough cable slack that the bars can turn fully lock to lock without pulling on the connector.

Maintenance tips

  • A silicone cover or screen protector adds real life to a display that sits in the sun.
  • If the screen fogs internally, let it dry indoors before assuming it is dead; water behind the glass is common after pressure washing.
  • Park the bike out of direct sun when you can; sun and heat fade LCD panels faster than anything else.

Frequently asked questions

How do I find my display model?

Look for a model number printed on the back of the housing, inside the button cover, or on the cable label. Your bike's manual or the maker's parts page usually lists it as well.

Will a different brand's display work with my controller?

Rarely. Even within one brand, the display and controller must use the same protocol. Treat the pair as a unit unless the controller maker lists the display as supported.

Can a new display make my e-bike faster?

Some displays expose a speed-limit setting that the controller honors, but the motor and controller set the real ceiling. Changing limits may also take the bike outside its legal class, so check local rules.

My display is blank but the bike has power. Is it the display?

It might be, but check the display connector, the main harness, and the brake sensors first. A display that is blank because of a protocol mismatch or a broken pin in the plug is far more common than a dead screen.

Do I need a color display?

No. Color displays look nicer and some show more data, but a clear monochrome LCD is easier to read in bright sun and usually cheaper to replace.

More e-bike parts categories